Creating a Christmas parade float is all about big impact, clear themes, and simple construction that can survive movement, weather, and lots of eyes on it. To keep things manageable, think in layers: the base trailer, the main structure, the background, and then costumes and props for people riding on the float. Planning ahead with a sketch, a color palette, and clear roles for helpers will make building day much easier.
Basic things you’ll need for most floats:
- A flatbed trailer or small truck bed
- Plywood sheets or lightweight frames (wood or PVC) for structure
- Zip ties, duct tape, bungee cords, and rope
- Screws, brackets, and a drill/driver
- Chicken wire or mesh for shaping hills, snowbanks, or big props
- Cardboard, foam board, and large boxes
- Rolls of colored plastic tablecloths or parade float “fringe”
- Paint, brushes, and spray paint
- Fabric, felt, tulle, and batting/polyfill (for “snow”)
- Battery-operated lights, lanterns, or LED strips
- Costumes, Santa hats, scarves, and simple hand props
Basic steps to build your float:
- Confirm parade rules: size limits, power restrictions, safety rules (no loose items, fire-safety rules, etc.).
- Measure your trailer/truck bed and sketch a side and top view of your float, including main props and where people will stand or sit.
- Build a solid base: secure plywood platforms and railings or side frames so riders have stable places to sit or hold on.
- Add structure: use wood or PVC to build any archways, “houses,” sleighs, or big shapes, and cover with cardboard, fabric, or mesh.
- Cover and decorate the base with float fringe, fabric, or colored plastic to hide wheels and hardware.
- Layer decor: large items first (big props and backdrops), then medium accents (signs, garlands), then details (lights, fake snow, ornaments).
- Test: roll the float slowly to check that nothing drags, flaps dangerously, or blocks driver visibility. Adjust before parade day.
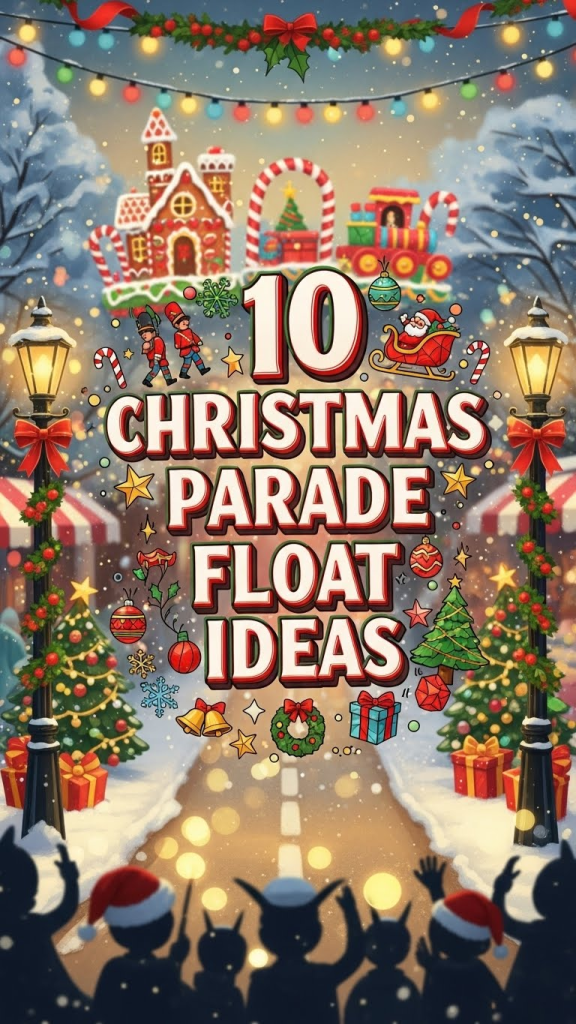
Once your basics are ready, here are 10 Christmas parade float ideas you can adapt to your budget, group size, and style.
1. Santa’s Workshop Toy Factory
A Santa’s Workshop float is bright, busy, and perfect for kids and community groups. It can feature elves “making toys,” large gift boxes, and a conveyor-belt look on the trailer.
How to do it:
- Build a low “workbench” along one side of the trailer using plywood on crates or blocks. Paint it red or green.
- Stack oversized cardboard “gifts” with bows, stuffed toys, and fake tools like hammers and paintbrushes.
- Use cardboard gears or painted foam circles along the sides to look like a toy-making machine.
- Dress riders as elves in striped socks, aprons, and pointy hats, pretending to wrap presents and check lists.
Things you need: plywood, cardboard boxes, craft paper, paint, large bows, toy props, elf costumes, float fringe in red/green.

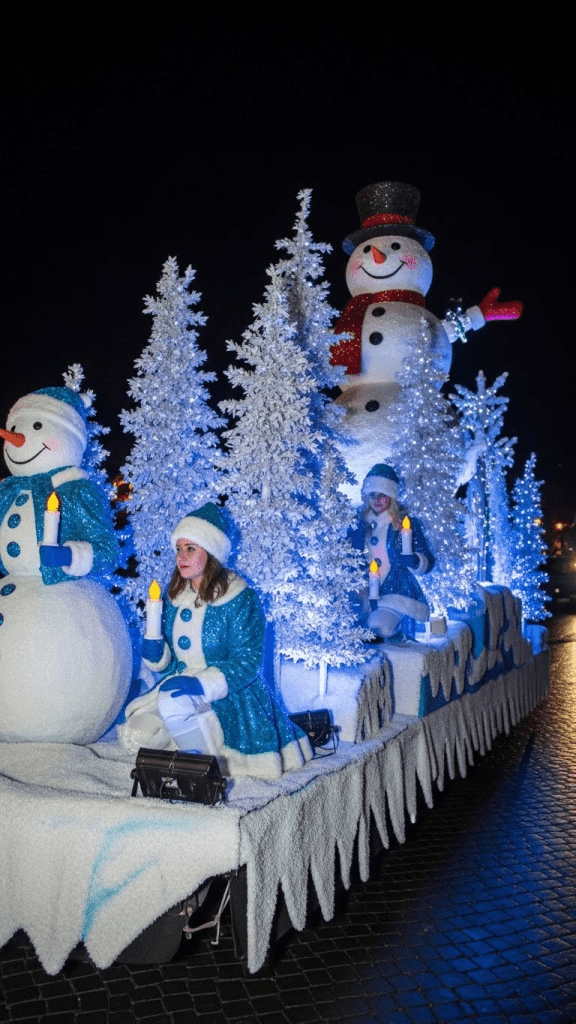
2. Winter Wonderland Snow Scene
This float focuses on snowy magic: glittering trees, frosty blues and whites, and maybe a snowman or ice castle element. It works well for choirs, schools, or church groups.
How to do it:
- Cover the trailer floor in white fabric, old sheets, or plastic, then top with batting or polyfill “snow drifts.”
- Create simple cone or triangle trees using cardboard or foam, paint them white or silver, and sprinkle with glitter.
- Add a central feature: a big snowman, “ice throne,” or faux igloo made from white boxes.
- Have riders in white, silver, or blue coats, scarves, and hats waving snowflake wands or holding LED candles.
Things you need: white fabric, batting/polyfill, cardboard, silver/blue paint, glitter, battery fairy lights, snowflake cutouts or props.

3. Nativity or “O Holy Night” Float
A nativity float tells a traditional Christmas story and is ideal for churches or faith-based groups. Keep it simple, calm, and respectful, with warm lighting and earthy colors.
How to do it:
- Build a small stable structure at the back of the trailer using wood or PVC frame and brown fabric or pallet boards as walls.
- Place a manger (wooden crate filled with straw or raffia) at the center with a doll wrapped in cloth as baby Jesus.
- Dress riders as Mary, Joseph, shepherds, and wise men in robes, shawls, and simple headpieces.
- Add a large star on a pole rising above the stable, wrapped in lights so it glows.
Things you need: wood or PVC, brown fabric or pallet wood, straw/raffia, doll, simple robes and scarves, large star cutout, warm white lights.
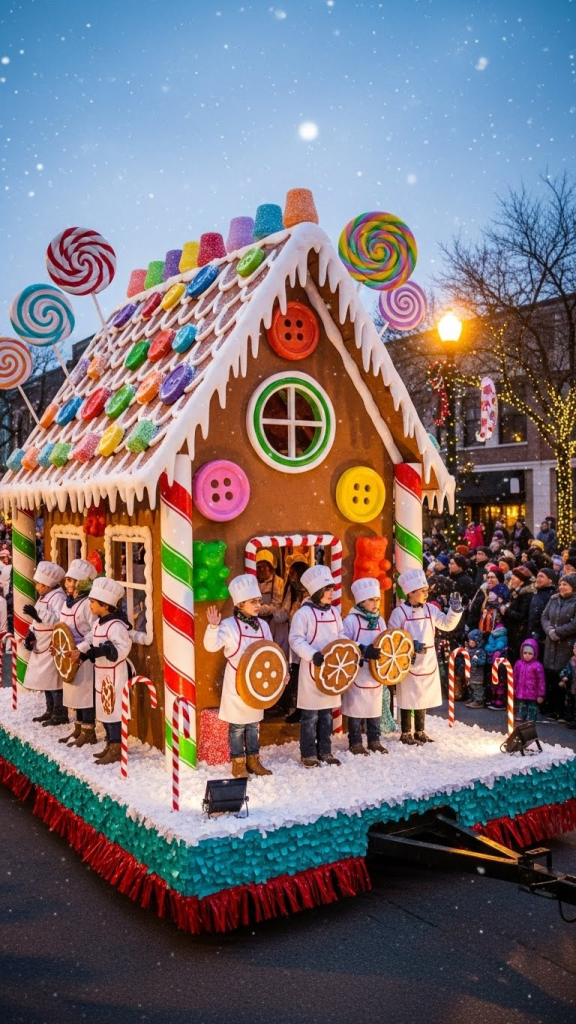
4. Gingerbread House Candyland Float
Turn your trailer into a life-size gingerbread house surrounded by candy props. This is colorful and playful, great for bakeries, youth groups, or family floats.
How to do it:
- Use large cardboard sheets or foam board to create “walls” along the sides of the trailer, painting them brown with white “icing” swirls.
- Add huge candy props: pool noodle “peppermint sticks,” foam circles painted like lollipops, and felt gumdrops lining the edges.
- Outline windows and doors with LED lights or white paint to look like icing.
- Dress riders in baker hats, candy-themed outfits, or gingerbread costumes, pretending to “decorate” the house.
Things you need: cardboard/foam board, brown and white paint, pool noodles, dowels, colored paper or felt, LED lights, aprons and chef hats.
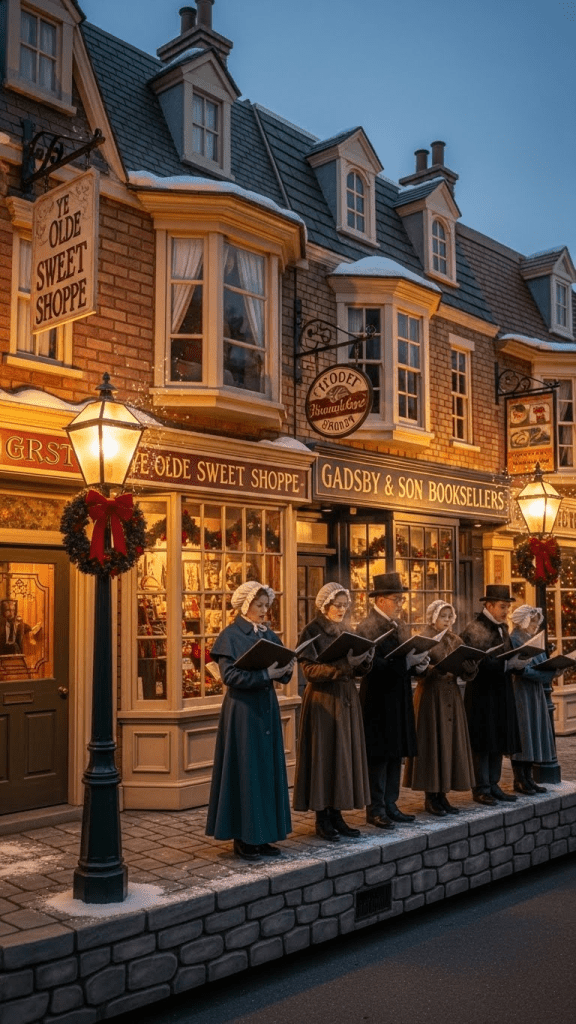
5. Classic Victorian Christmas Street Scene
A Victorian Christmas float feels nostalgic, with carolers, old-fashioned lampposts, and a cozy, old-town look. It’s perfect if you have a choir or musicians.
How to do it:
- Paint simple flat “building fronts” or shop windows on large boards placed along the sides of the trailer.
- Create one or two faux lampposts from PVC pipe, painted black with a simple box “lantern” at the top.
- Lay down “cobblestone” using printed paper, painted fabric, or foam sheets on the floor of the float.
- Dress riders in long coats, capes, scarves, top hats, bonnets, and mufflers, holding songbooks or faux lanterns as they “sing.”
Things you need: plywood/foam board, paint, PVC pipe, faux lanterns, old-fashioned costumes, songbooks, warm string lights.
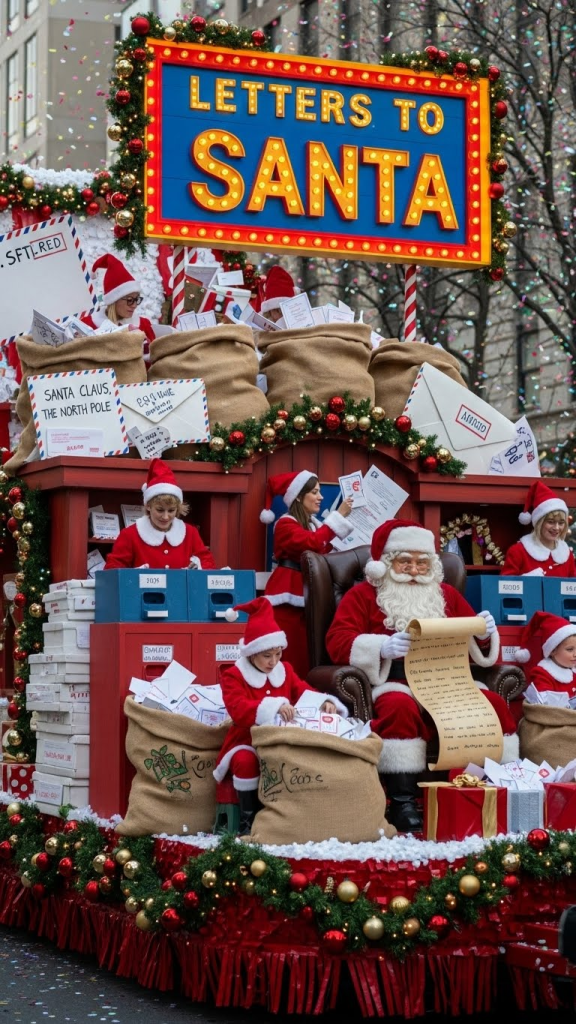
6. North Pole Mailroom and Letters to Santa
This float focuses on the magic of letters traveling to Santa. Think post office meets North Pole: mailbags, oversized envelopes, and a sorting station.
How to do it:
- Build a simple “sorting table” and background wall labeled “North Pole Post Office” with a big painted sign.
- Stack mail crates and bags (sacks or pillowcases) labeled “Letters to Santa.”
- Make giant envelopes and stamps from cardboard, painted with whimsical details.
- Dress riders as postal elves with caps and vests, pretending to stamp and sort letters, while one “Santa” reads a big scroll.
Things you need: plywood table, sacks or fabric bags, cardboard envelopes, red/white paint, signs, elf/postal costumes, fake letters.
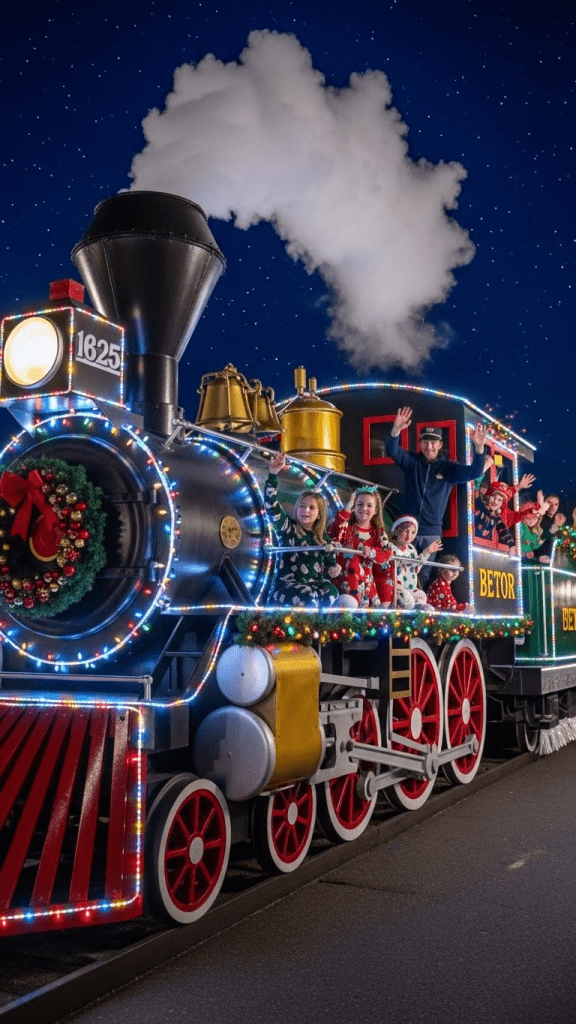
7. Polar Express or Christmas Train Float
A train-themed float is dynamic and recognizable, especially if your group loves the idea of a magical Christmas journey. You can build just the engine section or a couple of “cars.”
How to do it:
- Convert the front of the trailer into a train engine using a tall box or frame, with a cylindrical “boiler” made from a barrel or rolled cardboard.
- Add a big front “wheel” shape and a smokestack with cotton batting “smoke.”
- Paint the sides black, red, or dark green, adding gold details and a name like “Polar Express.”
- Have riders dressed as conductors, passengers in pajamas, or children waving from “windows” cut into the sides.
Things you need: large boxes, barrel or rolled cardboard, black/red paint, cotton batting, gold tape, conductor hats and scarves, bell prop.
8. Grinchy “Whoville” Fun Float
For a more playful twist, a Whoville-style float uses bright colors, wonky shapes, and cartoon-style props inspired by that mischievous green character and the residents of Whoville.
How to do it:
- Build curved, exaggerated building fronts along the sides, with wavy rooflines and off-center windows.
- Use neon and pastel colors: lime green, pink, turquoise, yellow. Add swirls and stripes.
- Create oversized ornaments, candy canes, and whimsical trees with twisted trunks and fluffy tops.
- Dress riders in wild “Who” costumes with bright coats, funky hats, and exaggerated hair, plus one person as a grumpy green character (staying within copyright-safe, generic styling).
Things you need: foam board/cardboard, bright paint, twisted tree props (PVC or cardboard), colorful costumes, wigs, and fun hats.

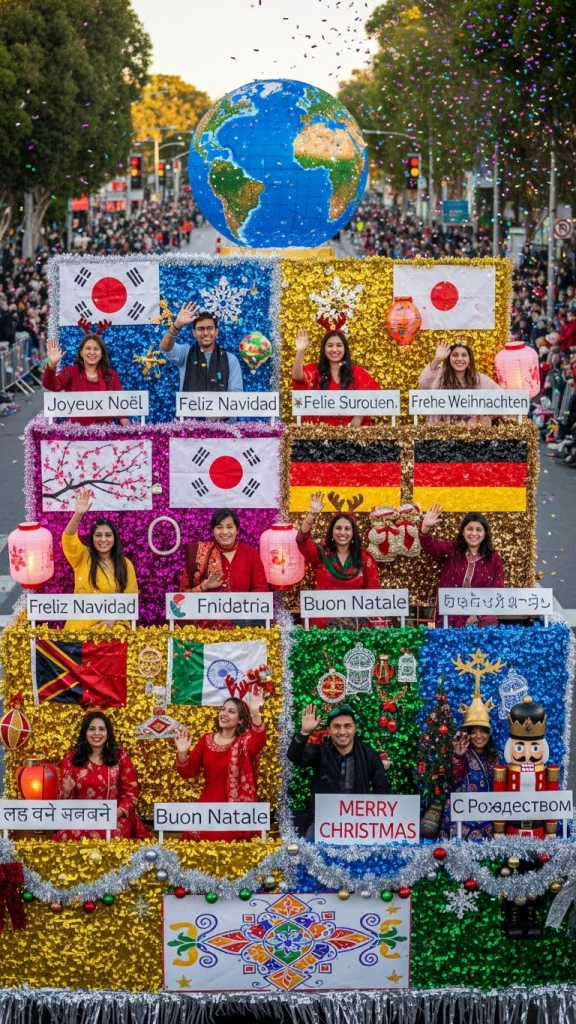
9. Christmas Around the World Float
Show different cultures and traditions by featuring multiple mini-scenes, each representing Christmas (or winter holidays) from various countries. This is great for schools or multicultural groups.
How to do it:
- Divide the float visually into sections with small signs or banners naming each country.
- Decorate each section with flag colors, typical decorations, and simple symbols (lanterns, nativity, stars, folk patterns).
- Have riders in traditional-style outfits or colors representing those cultures, holding flags or props.
- Add a big central globe or map with “Peace on Earth” or “Joy Around the World” as the main message.
Things you need: banners, printed or painted flags, world map/globe prop, fabrics in flag colors, simple cultural costume pieces, multilingual “Merry Christmas” signs.
10. Cozy Living Room “Christmas Eve” Float
Re-create a living room on wheels: a couch, fake fireplace, stockings, and a Christmas tree. It feels warm, relatable, and easy to build mostly from props you already own.
How to do it:
- Place a small loveseat or chairs on the trailer as a “sofa” area (secured safely!).
- Build a lightweight faux fireplace from cardboard or foam board, painting bricks and adding paper flames and stockings.
- Set up a decorated Christmas tree (tie it securely) with unbreakable ornaments and garlands.
- Dress riders as a family in pajamas or cozy sweaters, “opening presents,” reading a Christmas story, or sipping faux hot chocolate.
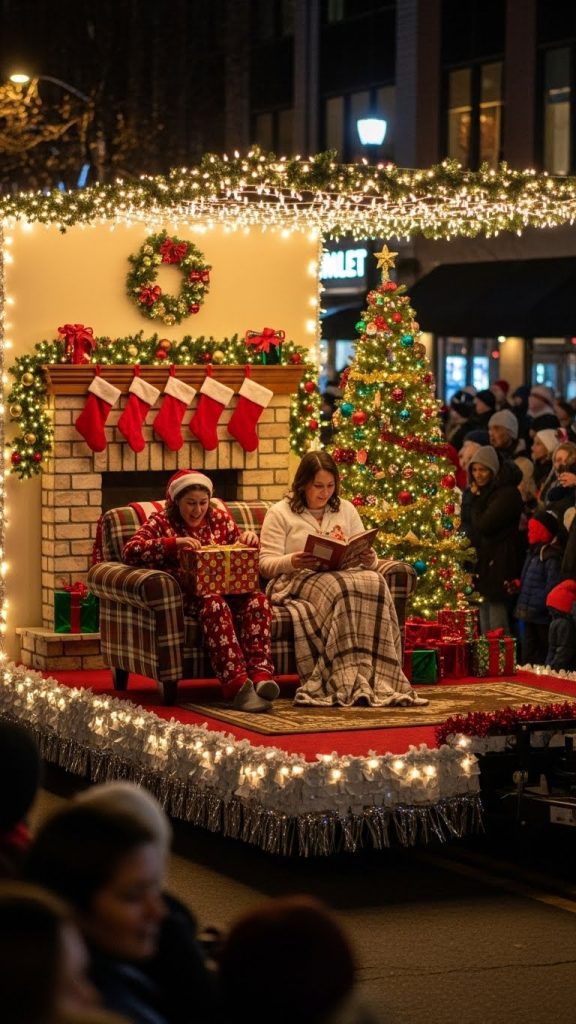
Things you need: small furniture (well-secured), cardboard fireplace, stockings, artificial tree, ornaments, wrapping paper, pajamas, and blankets.